
When you're working on a long Google Doc with lots of different sections, a table of contents can create some much-needed order. Luckily, Google Docs can make a table of contents for you based on text using the “headings” format — you just need to know how to make it happen. Here’s how to create a simple and easy-to-read table of contents in Google Docs both before and after adding those headings.
After clicking a choice, you’ll see a placeholder that says, “Add Headings (Format > Paragraph styles) and they will appear in your table of contents.”
5. Compose your doc, adding headings throughout.
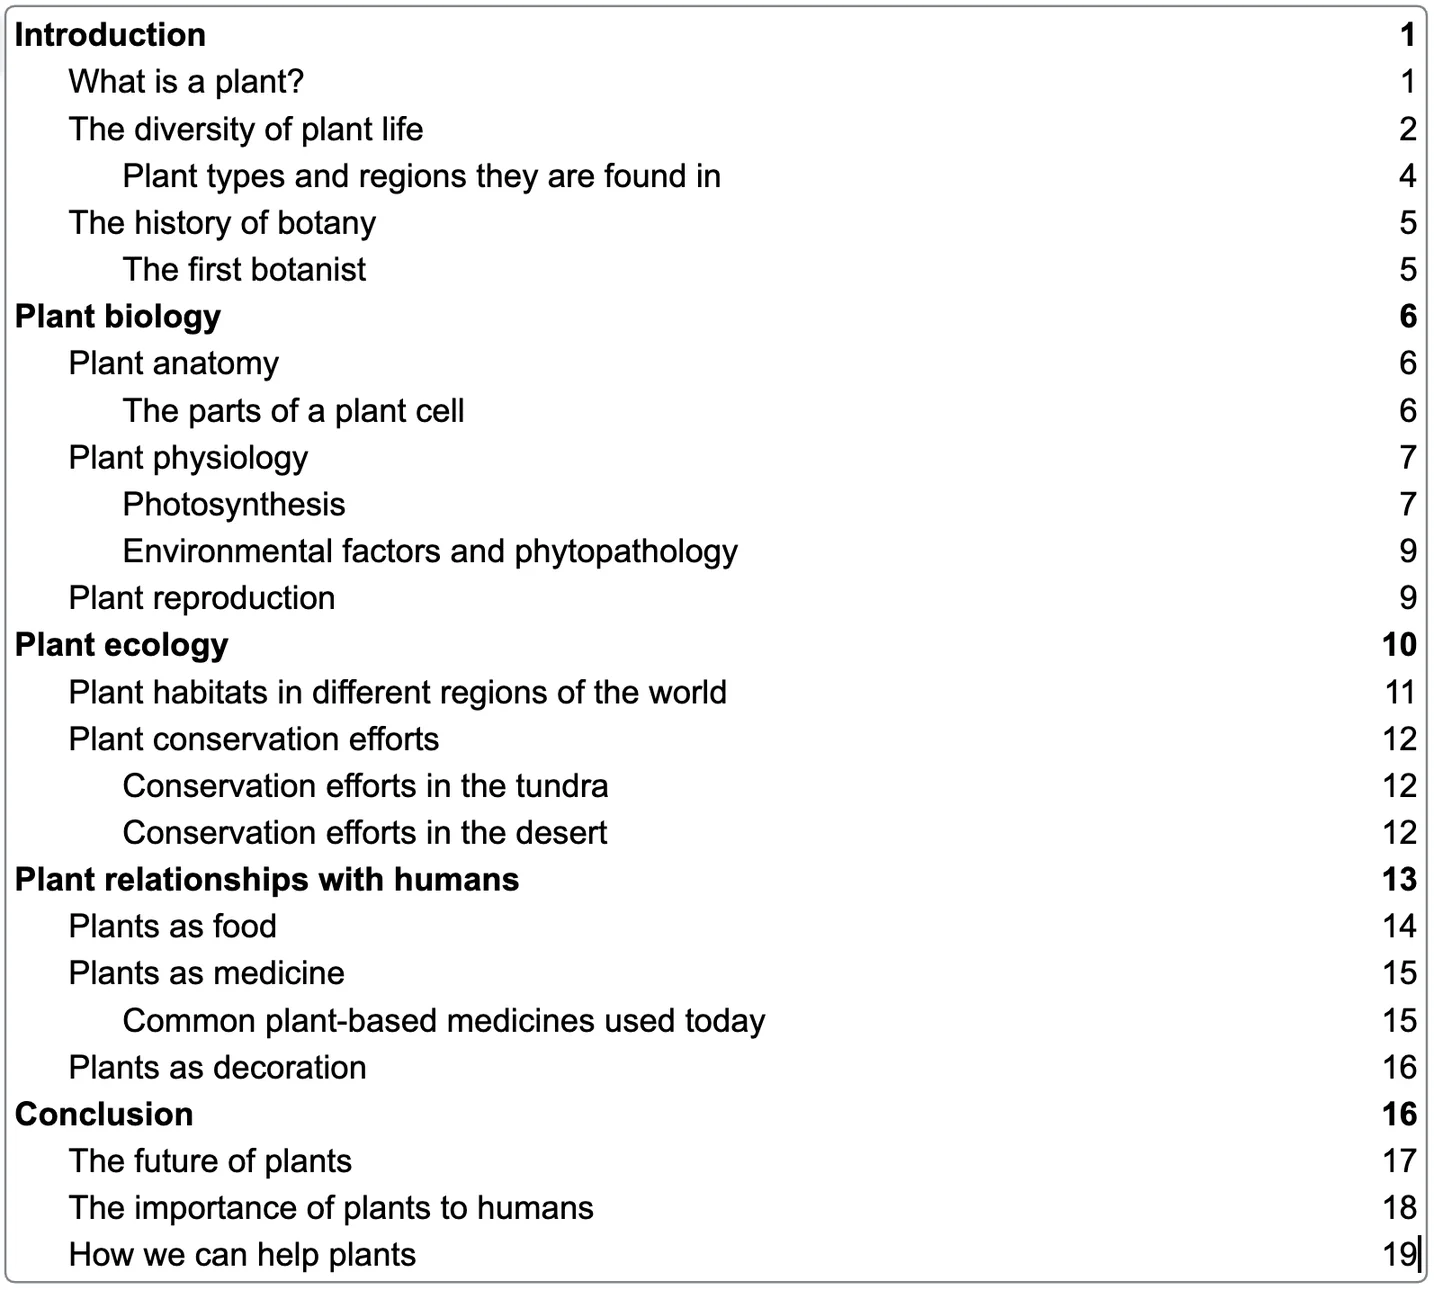
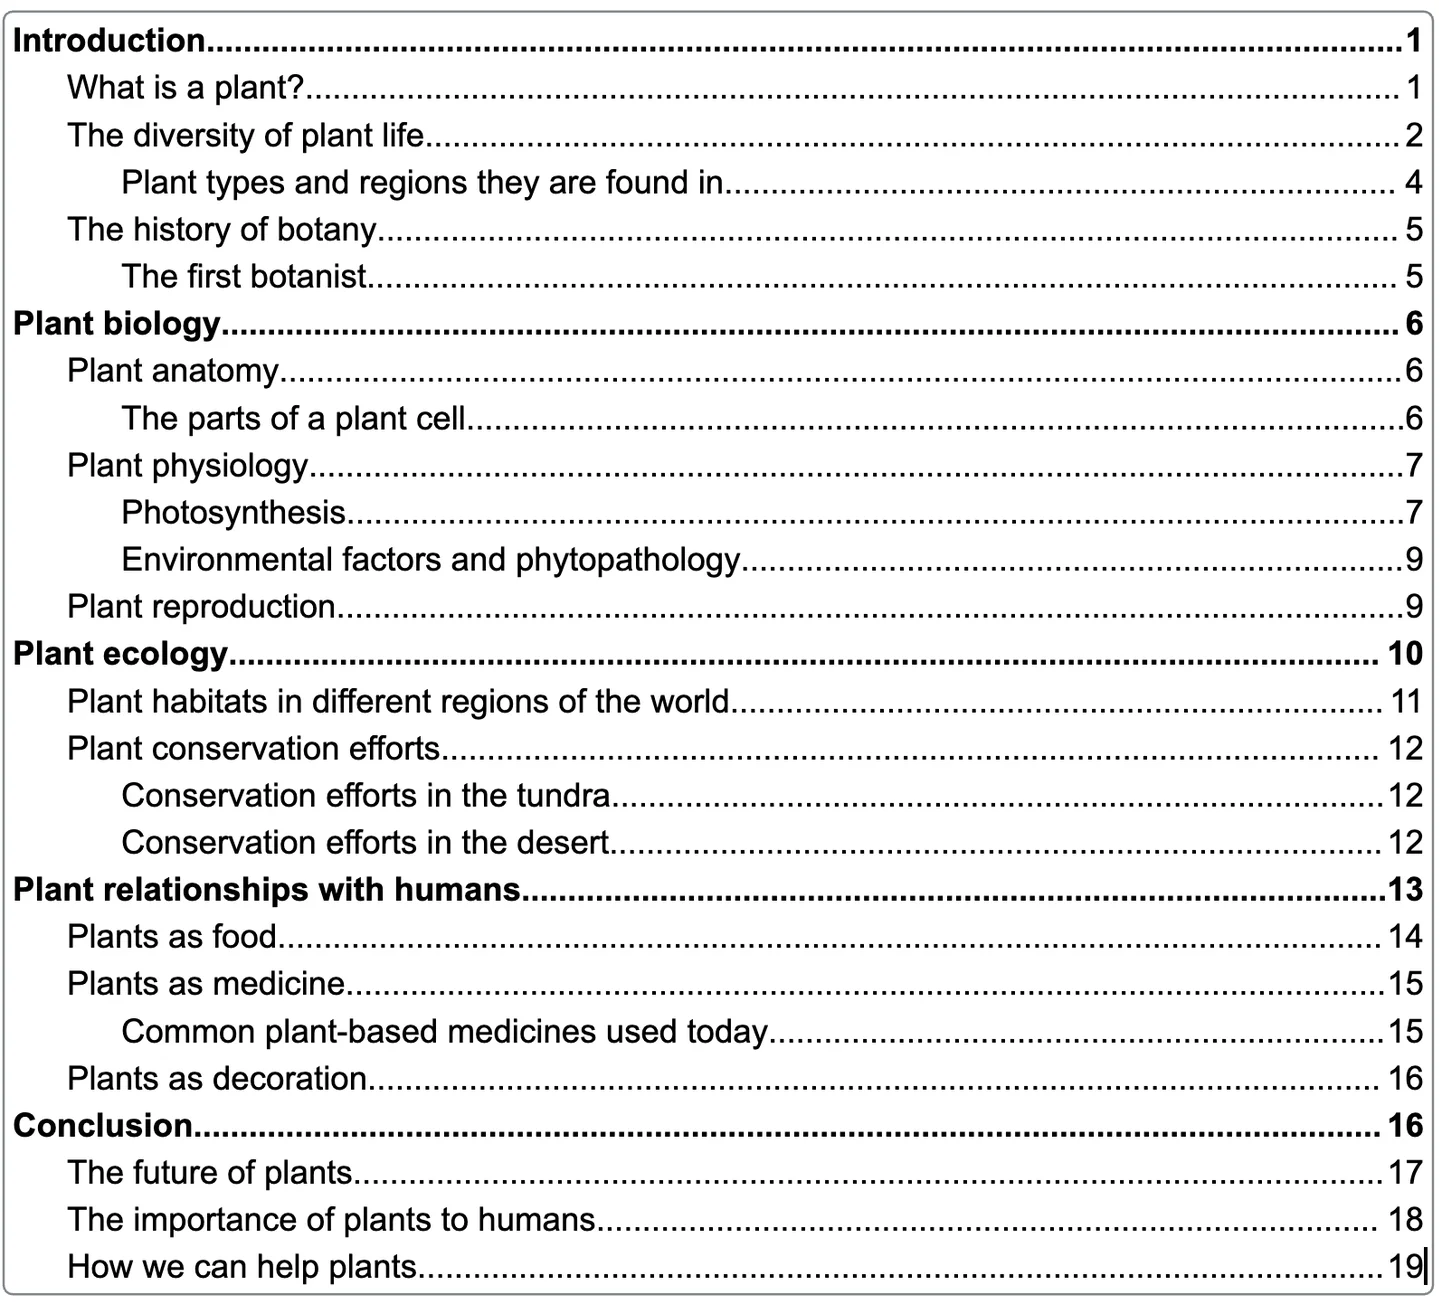
6. To add headings, hit the “Normal text” drop-down on your toolbar, select either “Heading 1,” “Heading 2” or “Heading 3,” then write out the headlines for your document. These headings will become the labels on your eventual table of contents.
Headings differ in size and shade — if there will be sections within your sections, outline-style, then it will likely make sense for each overarching section (or chapter) to be the largest heading style, “Heading 1.”
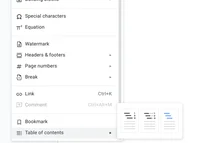
7. Right-click on the placeholder text and select “Update table of contents,” or hover over the table of contents to make an update icon appear on the left. Your headings will now appear in your table of contents.
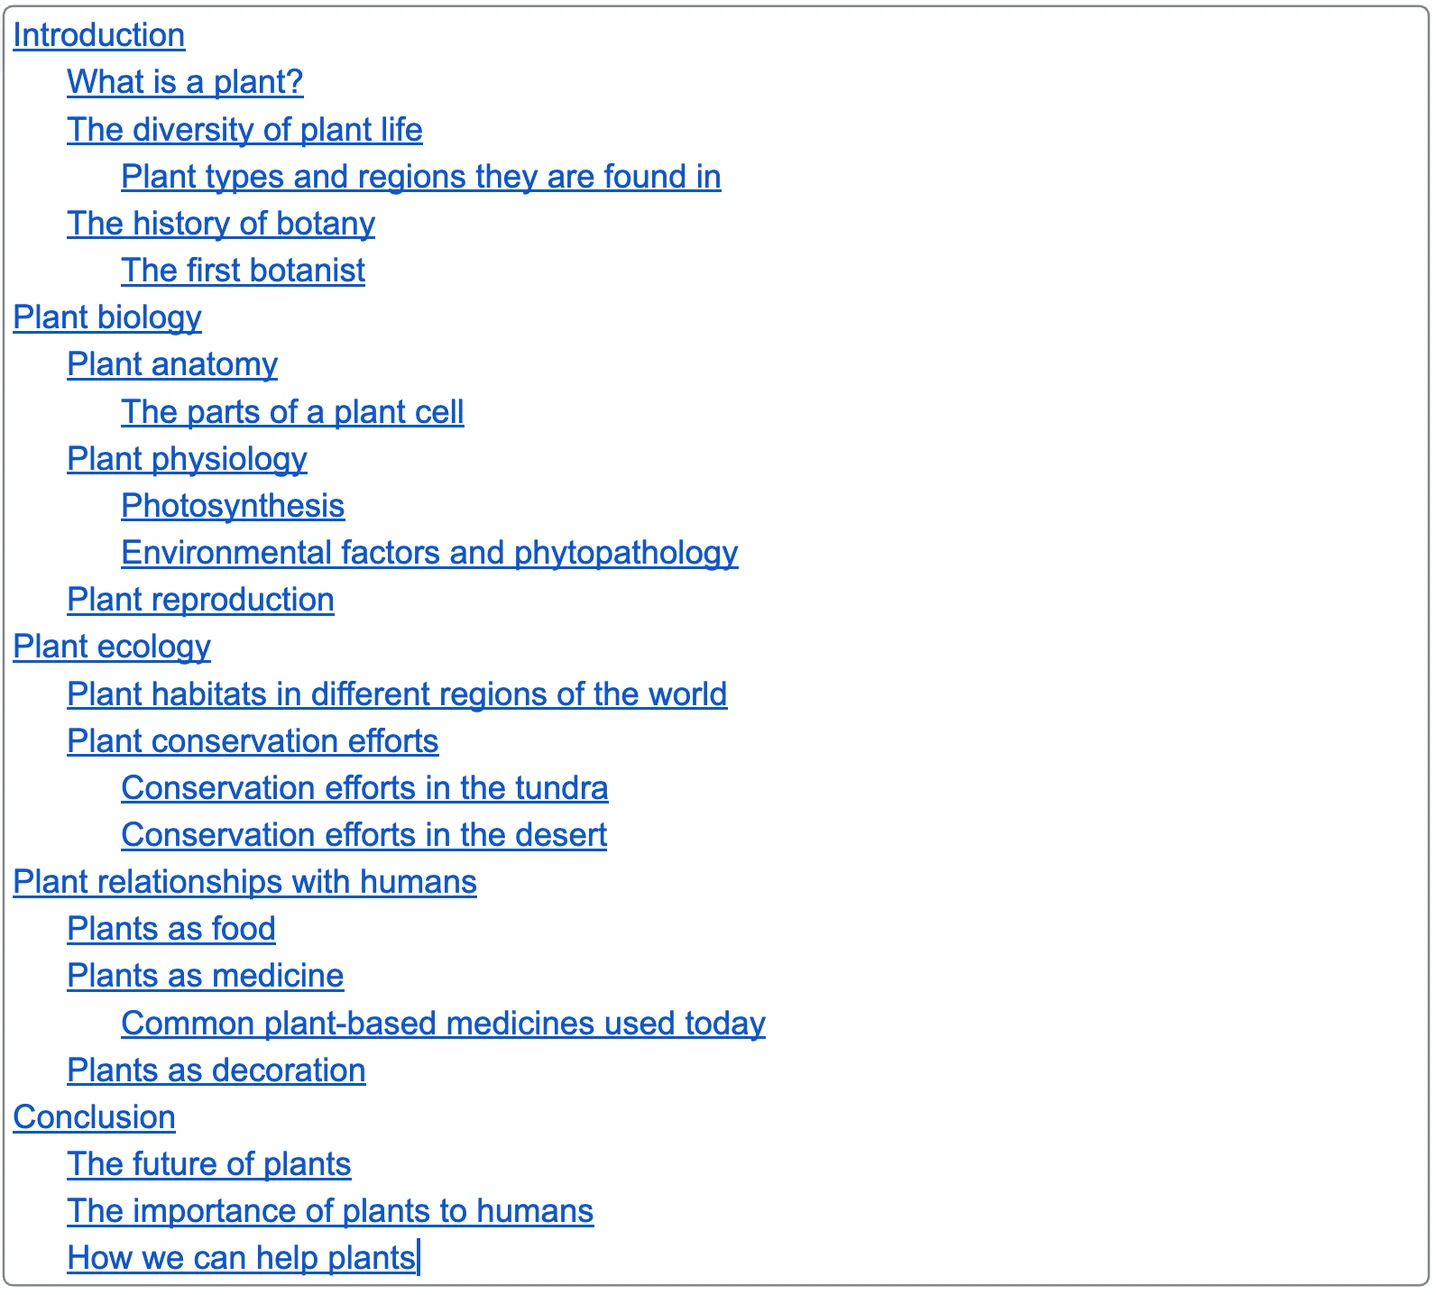
Once you've added a table of contents, you can customize it to match your exact needs by hovering over it, selecting the three-dot menu and choosing "more options." Here you can personalize the formatting, page numbers, line styles and heading levels to show in your new table of contents.
That’s it! Now you can make even more highly organized and easy-to-read Google Docs.